
This is a technique that I discovered while working on an art project in college. The assignment was ‘material alchemy’ – to transform a material in an unexpected way.
I was experimenting with cardboard and tried wetting it to see if I could fold it more easily or make curves. Unfortunately, as it got soggy the three layers would peel apart leaving me with a soggy middle layer and two flat ones that were slimy on one side.


I thought the slime was kind of gross, so I folded the pieces in half with the slime on the inside before trying to fold them up. I made some shapes and held them in place with rubber bands. The pieces dried very rigid and held their forms. I realized that I had inadvertently discovered a variant of wet-folding, a technique in origami where you fold wet sheets of paper that have ‘sizing’ in them (sizing is like starch for paper, or water-soluble glue) and when the models dry, they become rigid.
It turns out that the glue that holds cardboard layers together is usually water-soluble. If you sandwich the two outer layers together with the glue lines criss-crossed and then hold this in a certain shape while it dries, it will make a pretty strong shell.


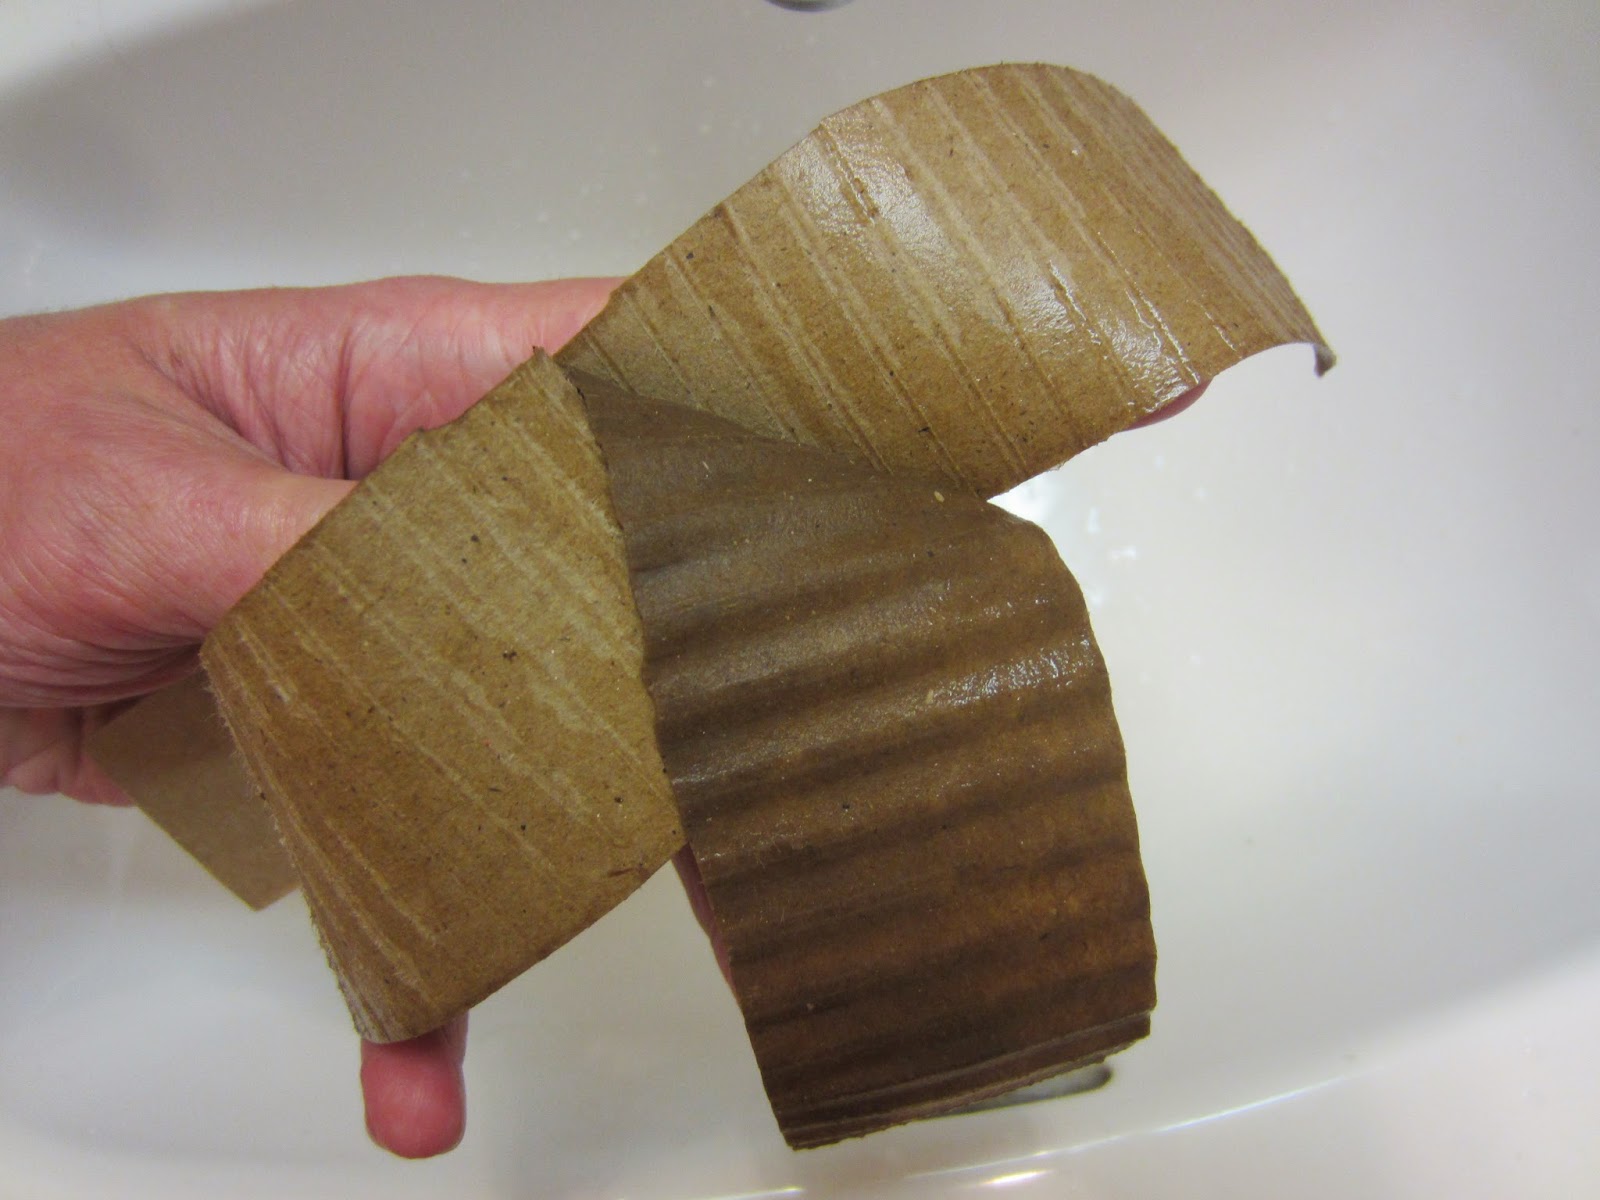
I’ve really only done this once, but my little marionette is still holding up very well years later. I took the demo photos above just now with a scrap of corrugated cardboard. To peel the layers apart, soak the cardboard thoroughly – be sure to run some water straight through the corrugation edge-on to moisten the inside too. It should then start to come apart quite easily.
Once the outer layers are separated, lay them sticky-sides-in criss-cross fashion and fold them into the desired shape while wet. Make sure that there is some pressure on them as they dry, and don’t remove this pressure until the cardboard is completely dry and stiff. This can take a pretty long time – I think I left my pieces by an open window for several days to dry. If your folds are at all flexible, then the cardboard is still too wet.
For my original project, I first created a little face.


I really liked its character, so I decided to make a body for it and produce a marionette. Inspired by a childhood toy, I decided on a form with two legs and no arms.


I shaped the leg and neck joints sort of haphazardly, but tried to give a birdish appearance to the feet and body. Everything was strung together with fishing line. Fishing line isn’t very good for marionettes because of its rigidity and difficulty attaching perpendicularly to surfaces, but it looked nice and was good enough for my amateur animations. I stuck it through each piece of cardboard with a big sewing needle.

I connected the head and body to the long part of a crossbar, and the feet to the shorter part. The marionette itself is really surprisingly rigid, giving a good hollow sound when knocked on. I would be curious to see if you could make a decent mask using this method (Groot, anyone?). At the very least, some simple origami is possible – I later made a small crane that I don’t have photos of, but is also holding up well with time.
I have a short video I made of myself poorly animating the marionette to wrap things up:

